Nowadays, there’s so much material available that
studying on your own is much easier than it used to be.
But even so, when you actually start working,
it’s incredibly common to get confused because the methods differ.
The methods you’ve learned so far are certainly not wrong,
but studios that already handle many tracks are likely using more efficient and stable methods.
That’s why I want to share that know-how bit by bit.
Intro
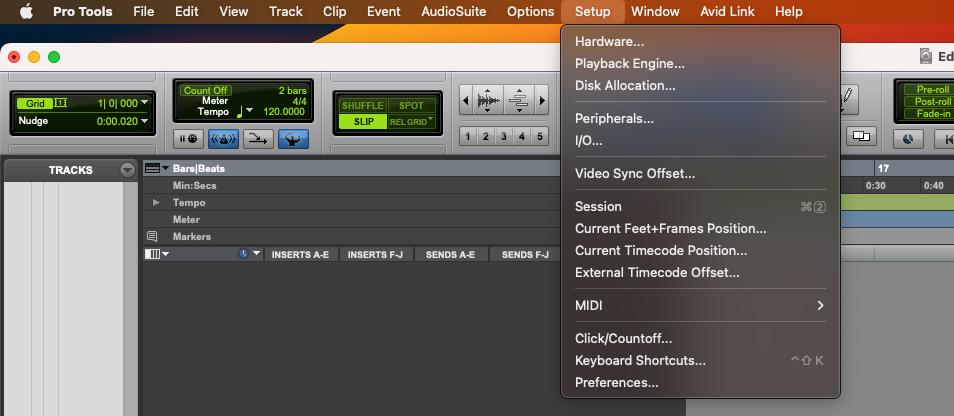
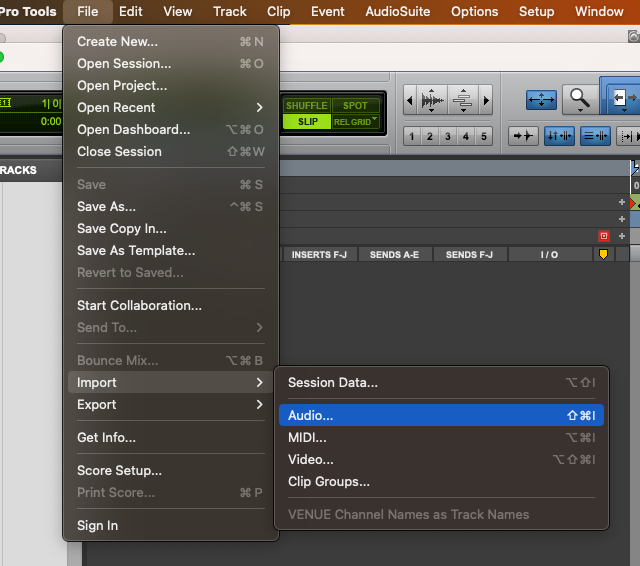
When you launch Pro Tools, the first tab you need to understand is the Setup tab.
If you don’t understand each menu here,
you won’t be able to properly handle unexpected accidents that occur suddenly.
Let’s understand them one by one, starting from the top.
1. Playback Engine
- Device
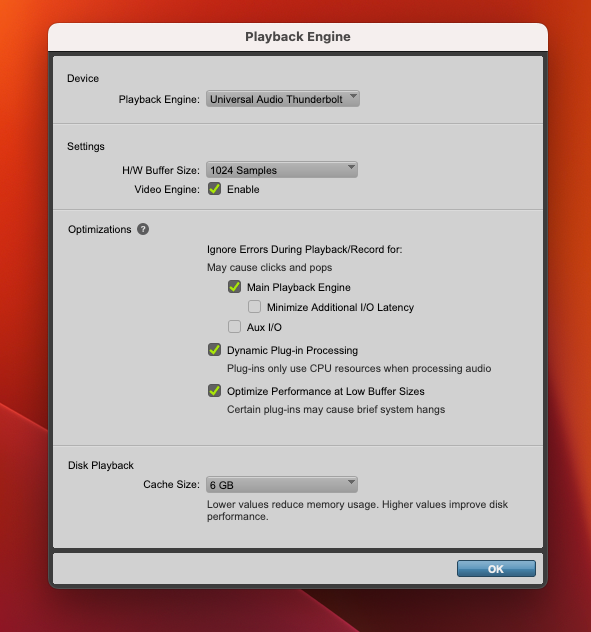
The first tab you’ll encounter is the Playback Engine tab.
The Playback Engine is literally where you select the device for playback.
It’s such a basic setting that there’s little to explain,
but it’s also the tab you should open first if any issues arise.
It’s especially common to panic when Protools suddenly stops
producing sound because you didn’t realize your audio interface or
converter was disconnected before launching it.
Unlike other DAWs, it doesn’t automatically reconnect devices,
so you absolutely must check this tab. - Settings
This is where you control the Buffer Size.
The Buffer Size refers to the container that temporarily
holds the audio signal being processed.
A larger container allows more data to be stored in advance,
reducing the likelihood of errors.
However, this increases latency,
so the smallest possible Buffer Size should be selected during recording.
Setting the Buffer Size too small significantly increases the risk of skipping or pop noise,
so the standard settings are typically ‘Recording: 128’ and ‘Mixing: 1024’. - Optimization
This section pertains to optimization.
The topmost Ignore Error section determines whether to stop or proceed
when clicks or pop noise occur due to CPU operation errors.
In the past, the goal was to turn it off during recording to minimize noise.
Nowadays, however, CPU performance has improved so much that noise rarely occurs,
and even minor noise can be completely removed using plugins.
Therefore, it’s best to keep it checked to avoid interruptions whenever possible. - Disk Playback
This is the area that determines the cache size.
It’s a setting that pre-allocates data to faster memory than
hard disks or SSDs to prevent interruptions during music playback.
Since entire tracks rarely exceed 4GB, setting it to 4GB or more is
usually sufficient to create a comfortable mixing environment.
2. I/O Setup
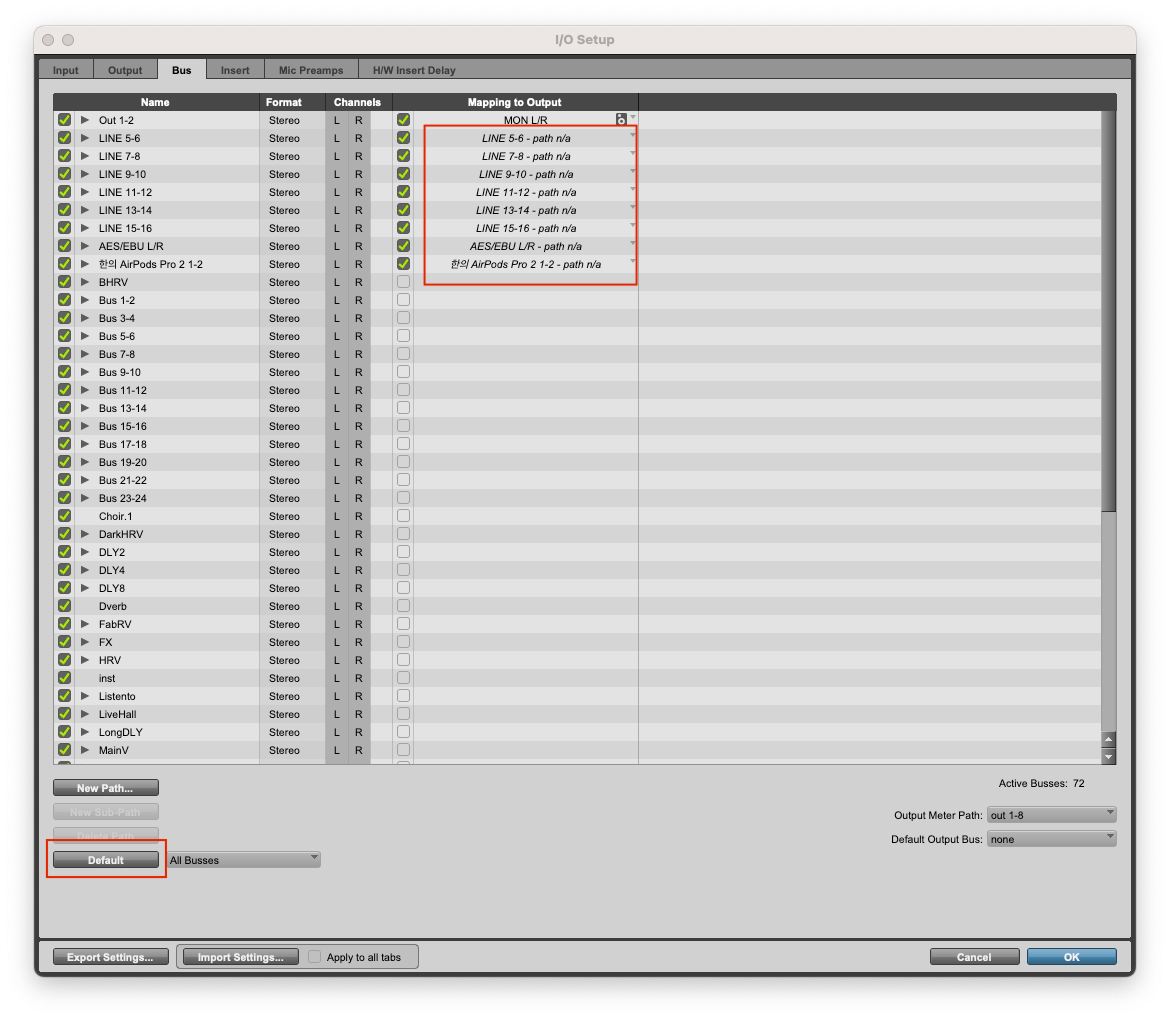
This is the second tab most frequently checked when issues arise.
It’s the tab for verifying the audio interface’s Input and Output.
If session data is being routed haphazardly,
unrecognized bus paths like the ones shown above will appear.
Typically, simply opening it and clicking the Default button resolves most problems.
3. Protools Preferences
This is probably the most complex and chaotic tab in Pro Tools.
To ensure a smooth and stable setup, you need to perform some basic tasks.
1) Display
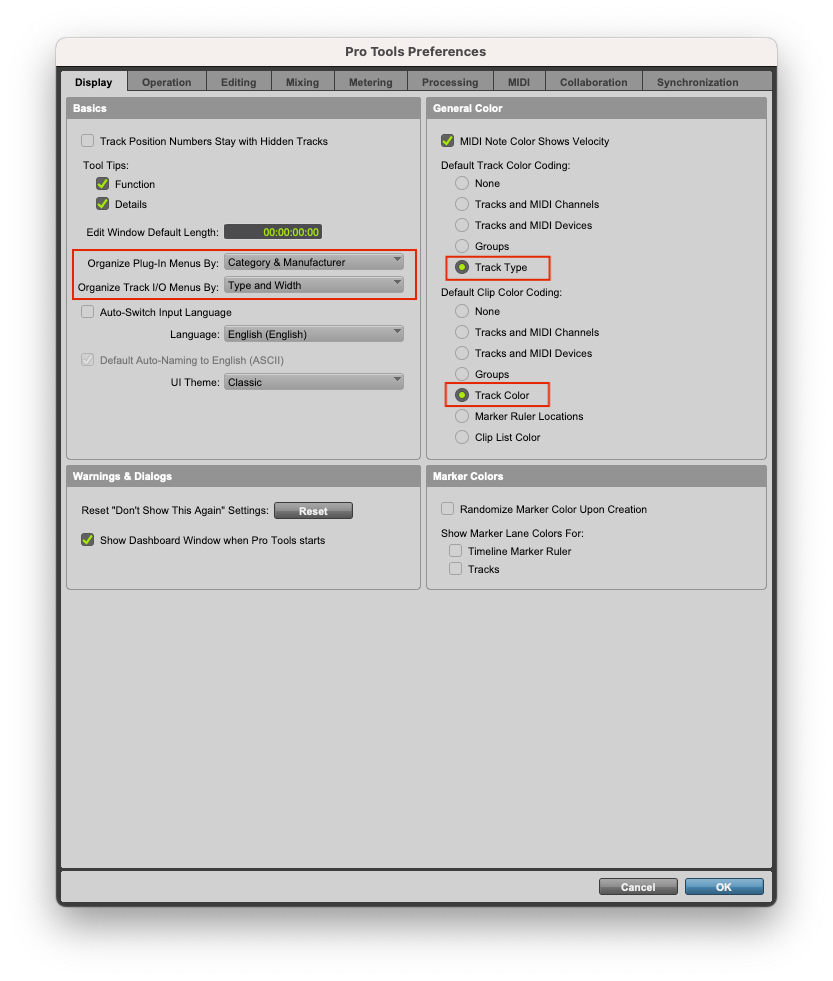
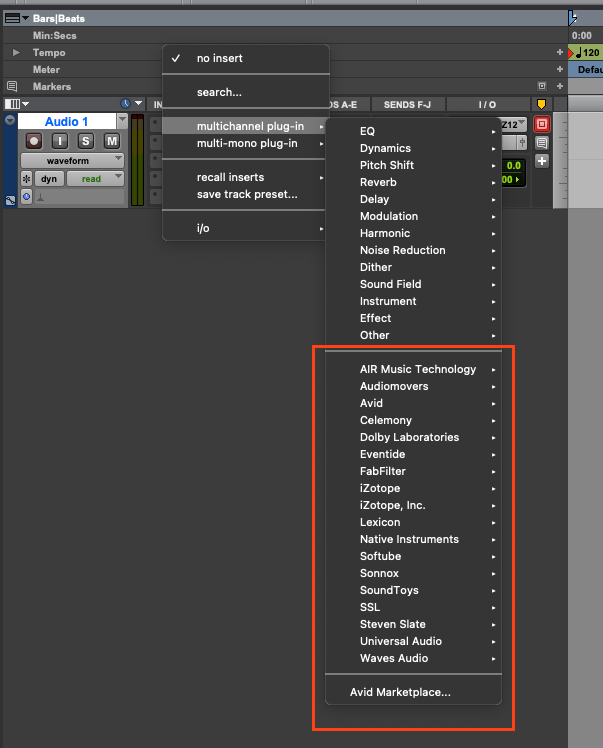
- Plugin Menu Settings.
When plugins start piling up, even finding a single EQ becomes overwhelming.
Organizing them by plugin company as shown above makes searching much easier. - Track Color Settings.
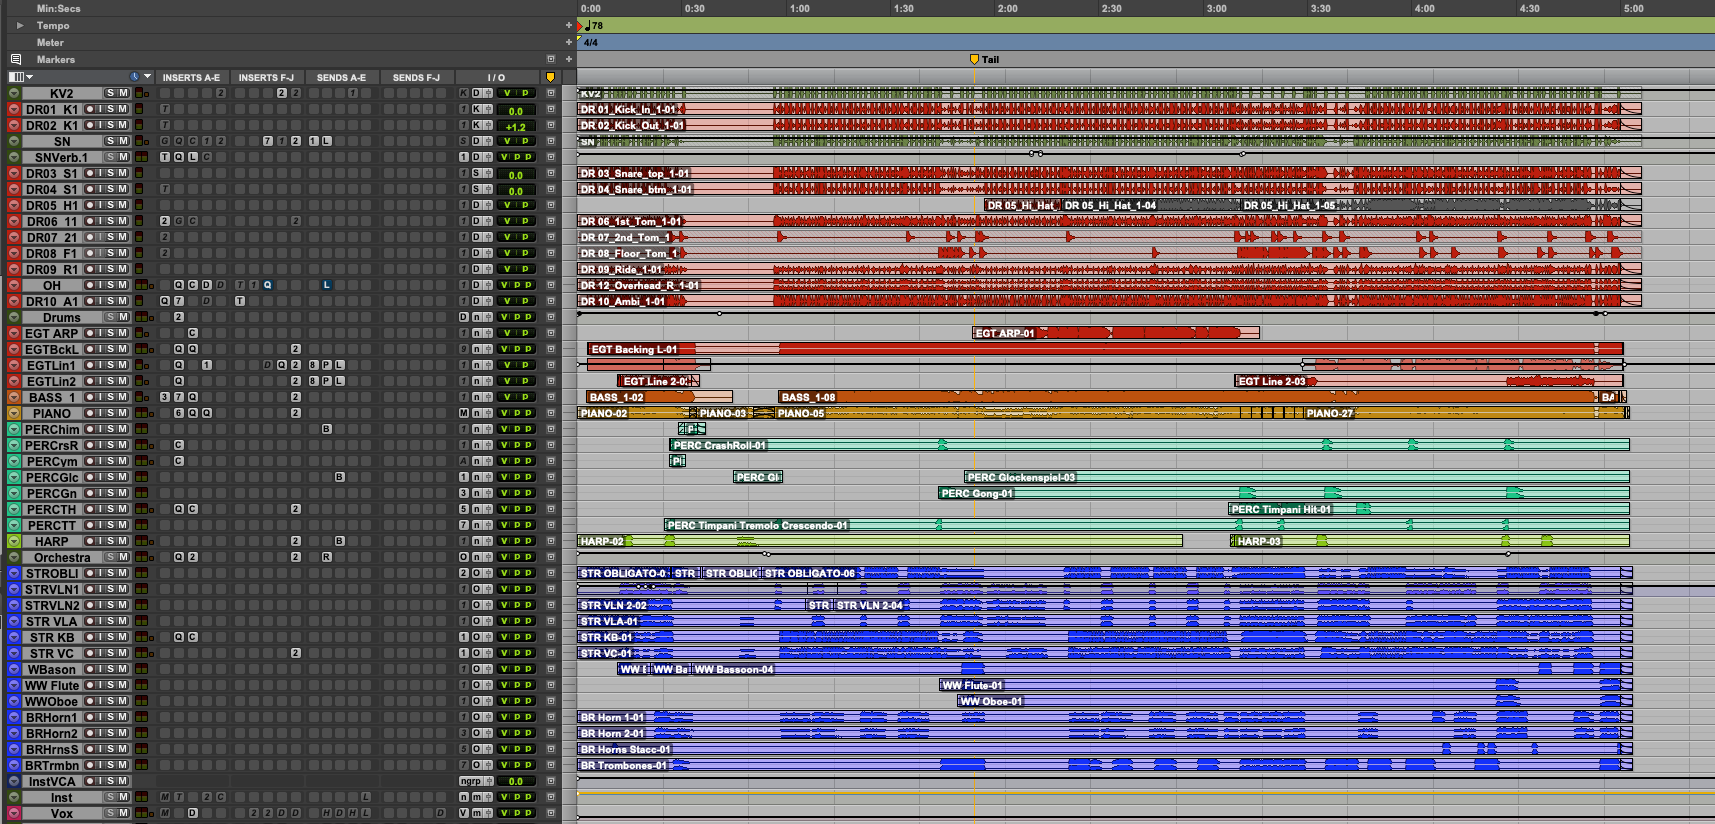
If you don’t set it up like this, track colors will become a jumbled mess.
By configuring the settings, you can organize them neatly by instrument as shown below.
Track coloring is a crucial task for visually distinguishing numerous instruments,
so organizing them neatly will make the mixing engineer very happy.
2) Operation
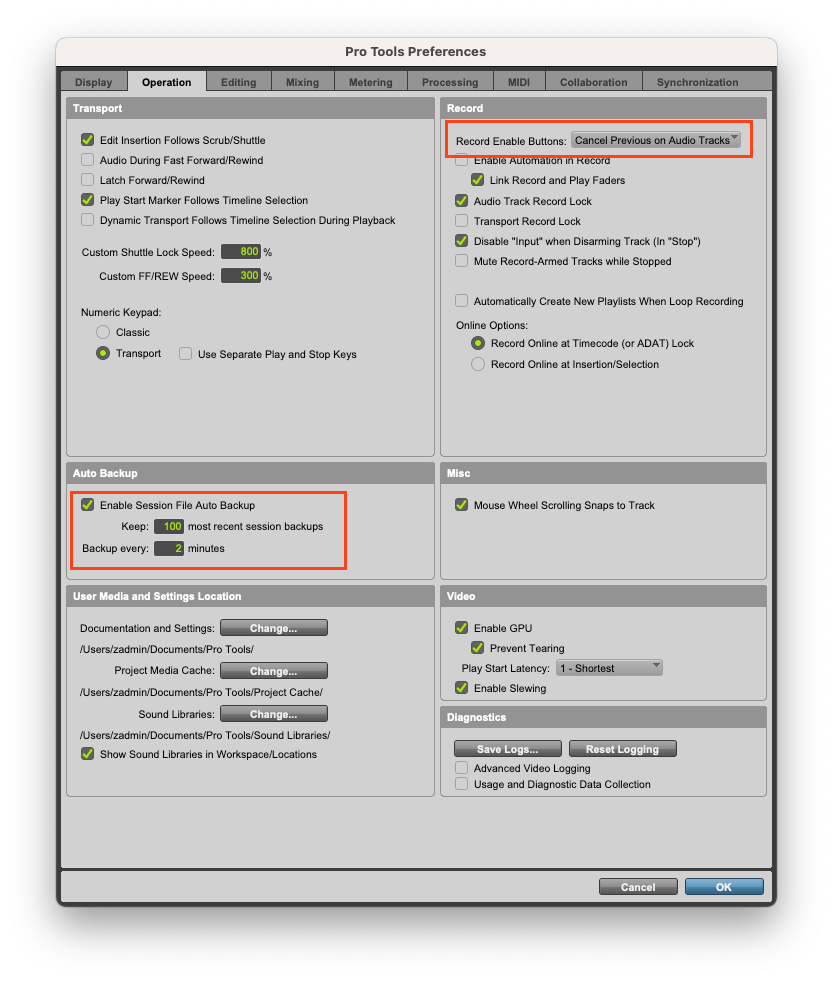
- Auto Backup
This is arguably the most critical setting across all configurations.
Since all software carries the risk of crashing or
shutting down unexpectedly, continuous backup is paramount.
Pro Tools allows customization of backup frequency and data volume.
By default, it’s set to back up every 5 minutes.
However, 5 minutes is an extremely long time in recording,
posing a risk of losing data that artists have painstakingly recorded.
I’ve set it to back up every 2 minutes by default and enabled storage for up to 100 backups.
This configuration ensures sufficient backup capacity for approximately 200 minutes of data,
equivalent to roughly one full project. - Record Enable Button
This setting varies depending on the type of recording you’re doing.
Since over 80% of recordings are vocals or single instruments,
it’s best to enable the Cancel Previous On Audio Tracks setting.
This button prevents multiple record buttons from being pressed simultaneously,
saving you the hassle of toggling it on and off when switching recording tracks.
When performing multi-track recording, simply revert to the default setting and use it as needed.
3) Editing
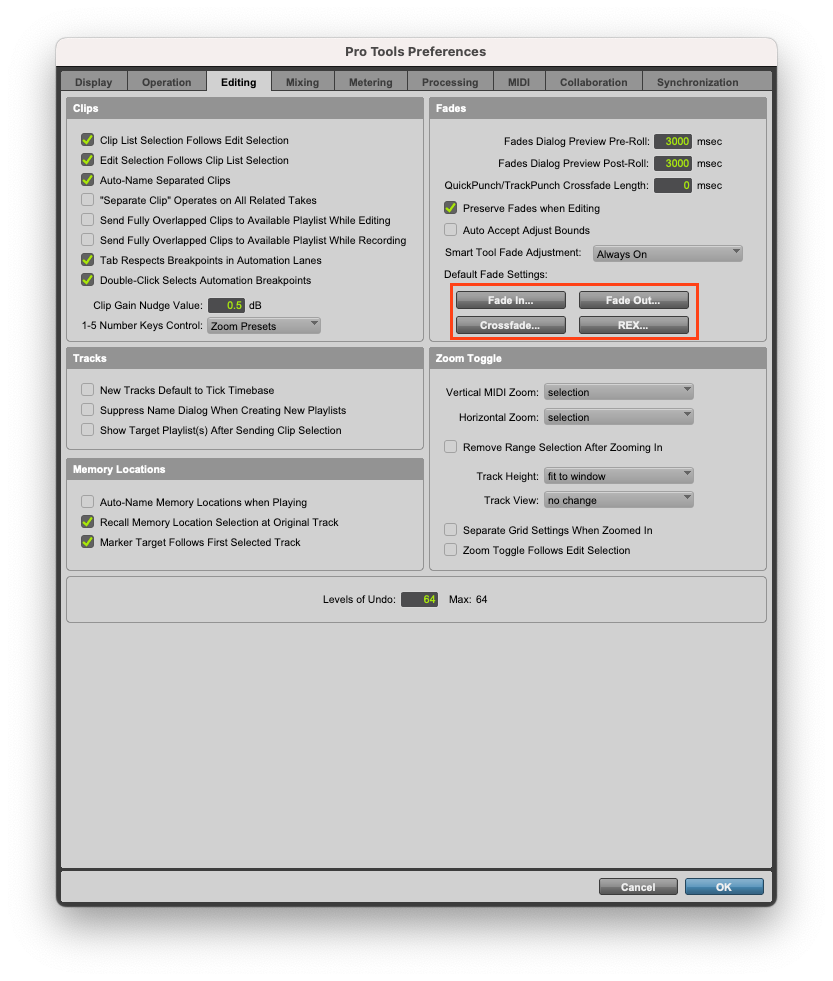
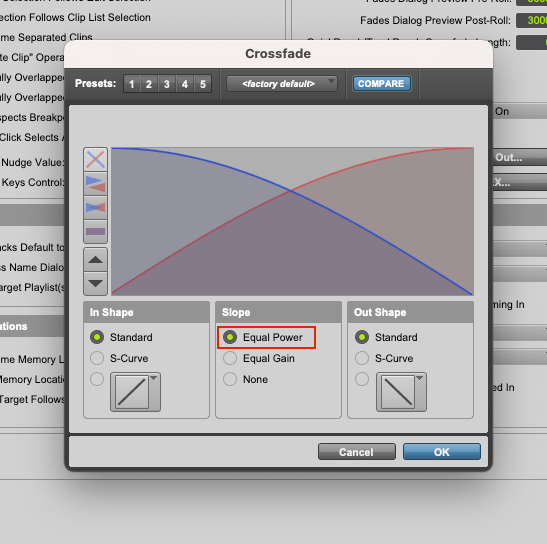
One thing to check in editing is the CrossFade setting.
Basically, it is often more natural to set it to Equal Power rather than Equal Gain when crossfading.
Since crossfades can always be changed manually,
I’ve set the default to the type I use most often.
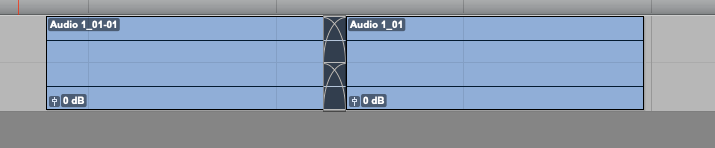
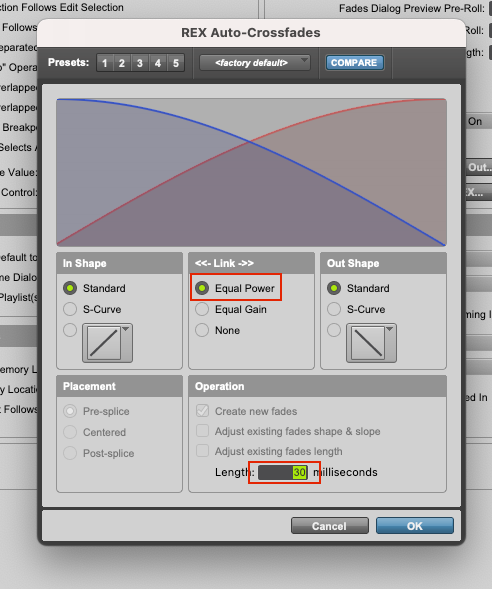
Additionally, Pro Tools offers an ‘Auto-CrossFades’ feature.
Crossfading can be one of the most tedious,
repetitive tasks for an engineer, but this function makes it
incredibly convenient—you can simply select all your clips and press the ‘F’ key.
However, you always need to go back and check the results,
so I don’t use it every single time.
To get more natural-sounding fades from the start and
save yourself some manual work, try setting the default crossfade time to around 30-50ms.
4) Processing
Usually, audio is imported into Pro Tools using the following method,
but there are times when dragging it directly from a folder is quicker and easier.
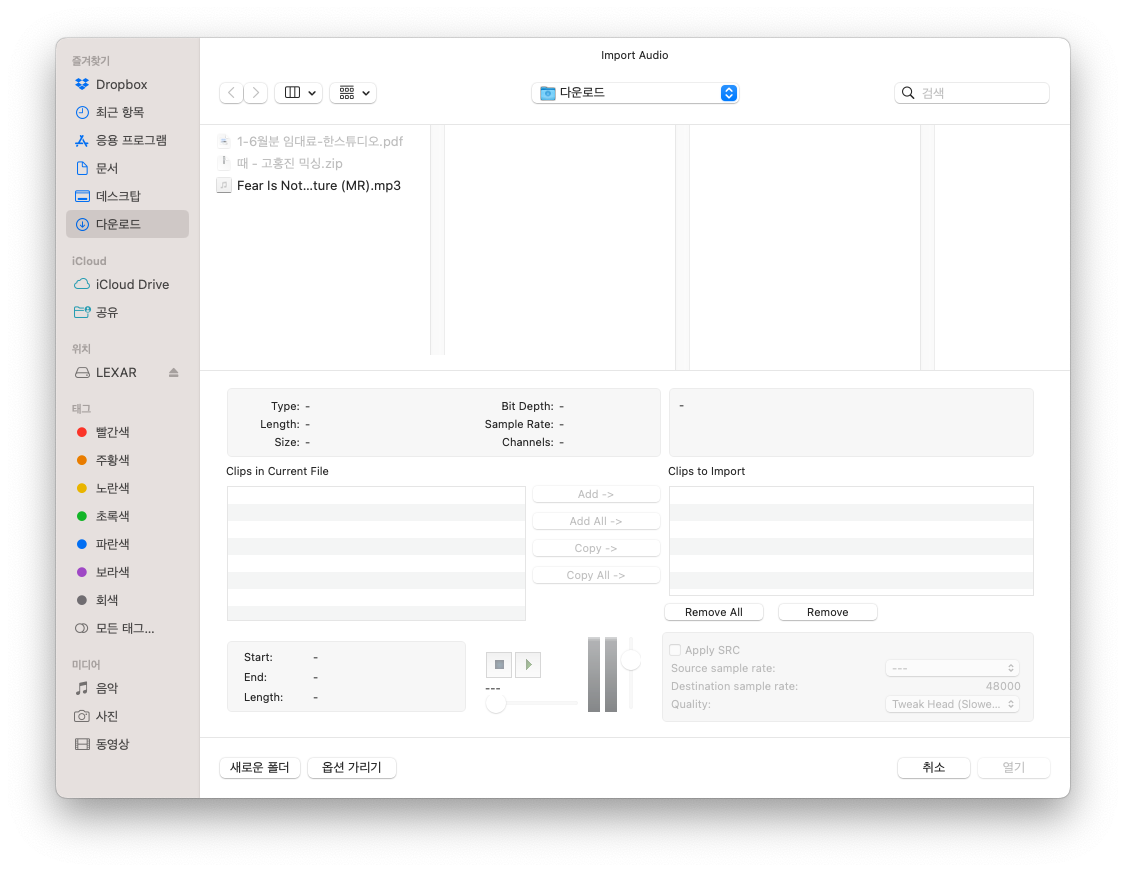
When dragging and dropping files into the Edit window, a few issues can arise.
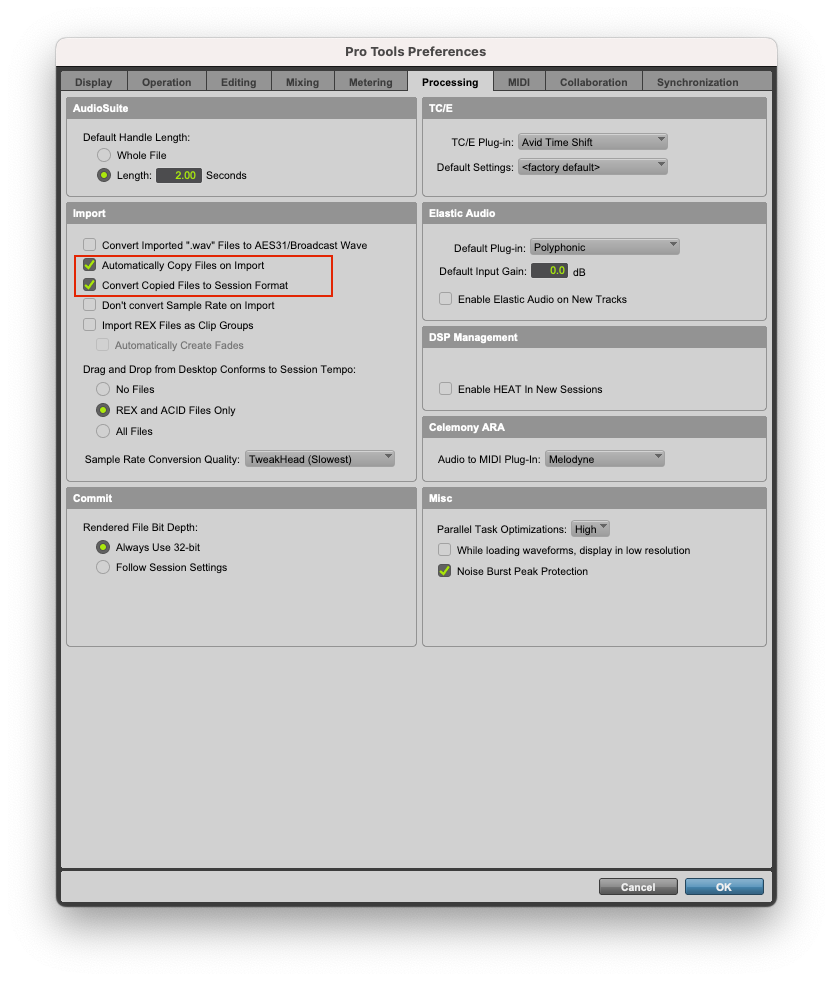
To prevent this, you should check two options.
Automatically Copy Files On Import
This option means that when you drag and import files,
Pro Tools will copy the files rather than just referencing them.
While this might seem obvious, Pro Tools, by default,
imports data by referencing it, not by copying.
This won’t cause problems on your computer, but if you
move the session data or delete the referenced files, you’ll lose your audio.
Checking this option prevents such a mishap.
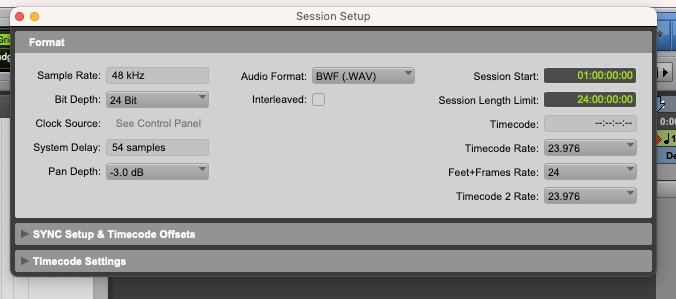
Convert Copied Files to Session Format
As you can see below, this session is created with a 48kHz/24-bit format.
If you import audio with the same format, there won’t be any issues.
However, if you import audio with a different format,
such as 44.1kHz, the length of the track will change.
To prevent this, the data needs to be converted to the session’s format (48kHz).
Checking this option ensures that any audio file format you import
will be automatically converted to match the session’s format.
Outro
We’ve now gone over the basic, yet complex, fundamental Pro Tools studio setup.
Although we haven’t even created a session yet,
if you don’t understand the setup above,
you won’t be able to react quickly when an unexpected problem occurs.
Ultimately, the ability to solve a problem is more important
than when everything is going smoothly, so understanding this basic knowledge is crucial.
If you can become a person who handles minor incidents in the studio well,
you will become someone that others can rely on and respect.