The album commissioned this time is “Place,”
a single CCM album by composer and pianist Kim Sohee.
Due to the artist’s busy schedule and the recording studio’s construction,
it took quite a long time to complete the album.
We worked on a total of three songs:
two lyrical ballads primarily featuring a piano and vocals, and one upbeat track with added percussion.
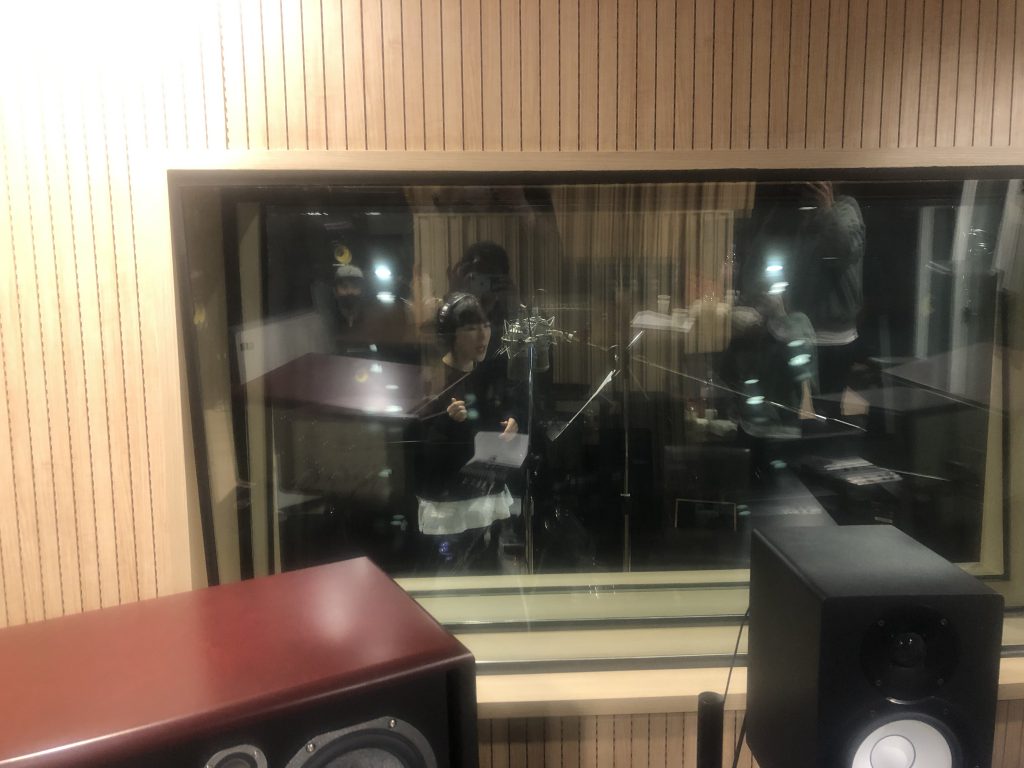
1. Piano and Vocal
The core of this song was the ‘harmony between a single piano track and the vocals.’
While many songs are filled with numerous instruments,
there are also many pieces composed solely of one instrument and a voice.
If you think, ‘Since there are few instruments, it will be relatively easy,’ you’d be greatly mistaken.
Music with few instruments must carry the mood from beginning to end;
if even one part feels awkward, the flow is broken.
The performer also faces immense pressure and can become
more sensitive because they are pouring everything into that single track.
Fortunately, through operating the channels “Musical Couple & Worship Couple” with my wife,
I’ve had countless opportunities to work on such projects, so I deeply understand this challenge.

This photo shows just how much attention was paid to a single vocal track.
When recording, every single emotion and breath is meticulously checked, resulting in such a complex session.
2. Vocal Recording and Microphone Selection
I am already familiar with this vocalist’s style as they come to our studio often.
However, for this recording, the microphone’s characteristics were more crucial than usual,
so I proceeded with a dedicated recording session to select the best microphone.
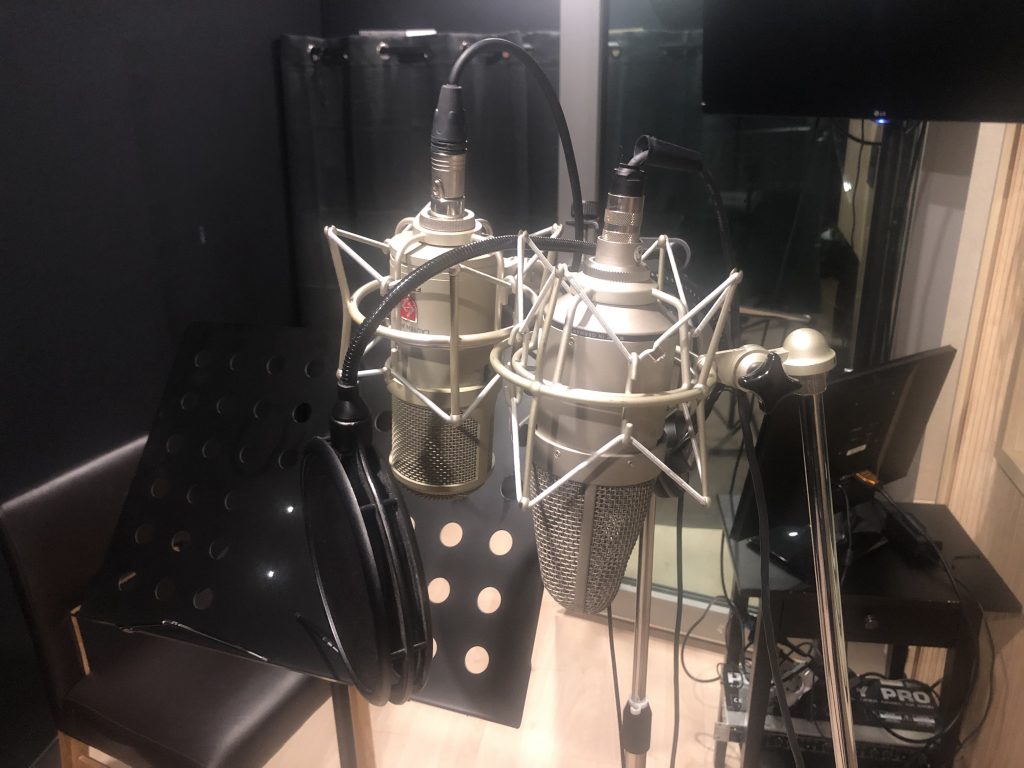

Neumann m149 & Lauten FC357 microphone samples
I always spend a lot of time deciding which microphone to use before a recording session.
If you listen to the FC-357 and the m149,
you can tell just how big of a difference a microphone makes.
First, the m149 sounds relatively brighter,
and you can really hear frequencies above 8k.
The FC-357, on the other hand, sounds flatter.
Interestingly, compared to a U87, the FC-357 sounds more forward,
which I think fits better with current trends.
The m149 sounds even more forward than that.
So, wouldn’t it be better to choose the m149? My choice this time was no.
The audience for this type of Christian music is very diverse,
ranging from children to adults.
Because this album needed to be something many people could listen to for a long time,
the focus was on creating a sound that was polished but not overly loud—a comfortable sound.
I also chose to proceed with the recording using the Lauten FC-357 because its character felt more natural.
3. Monitoring and Sketch
Sometimes, clients ask,
“What’s the biggest difference between mixing sources
recorded in a home studio versus those recorded in a professional studio?”
While there are countless differences like microphone types,
preamps, room acoustics, and techniques,
the most significant one is the ability to continuously listen for over three hours,
understand the vocalist’s tendencies and the song’s essence,
and create a mixing sketch during the recording session itself.
A good mix starts with receiving appropriate recording sources,
and these sources dictate the direction of the mix.
I can confidently say this difference is more impactful than simply recording with expensive gear.
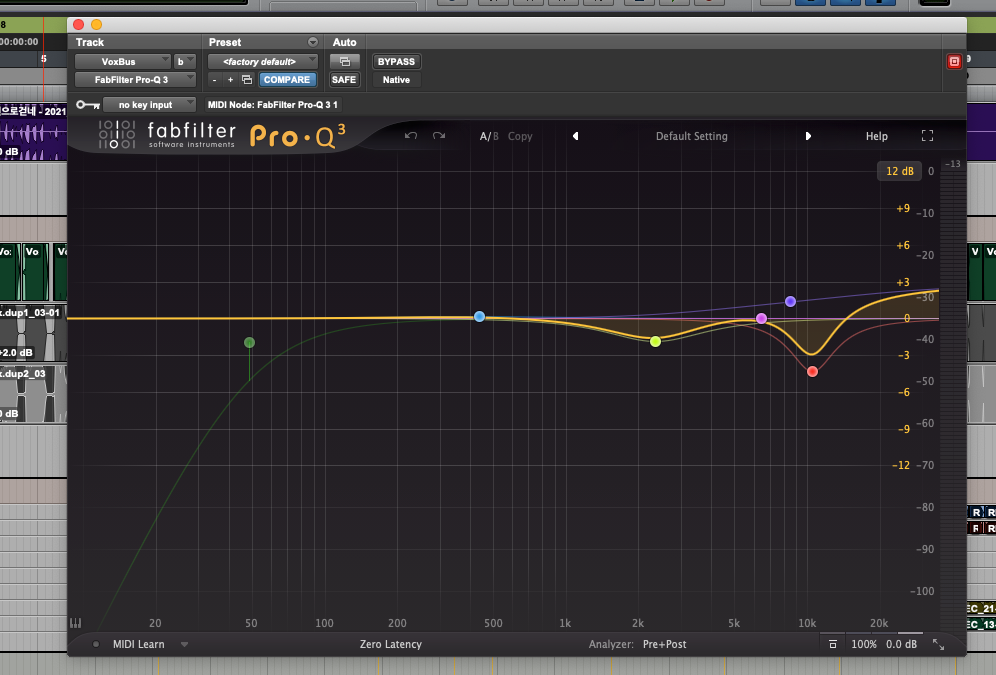
Looking at the EQ screenshot above, although it’s a monitoring EQ,
it also serves as a good sketch that captures
the vocal’s strengths and weaknesses during the recording time.
You can see that I slightly reduced the somewhat strong mid-range
and the harmonics from the Avalon 737sp tube preamp.
Consequently, I compensated for the slightly recessed vocal tone by boosting the high-end frequencies.
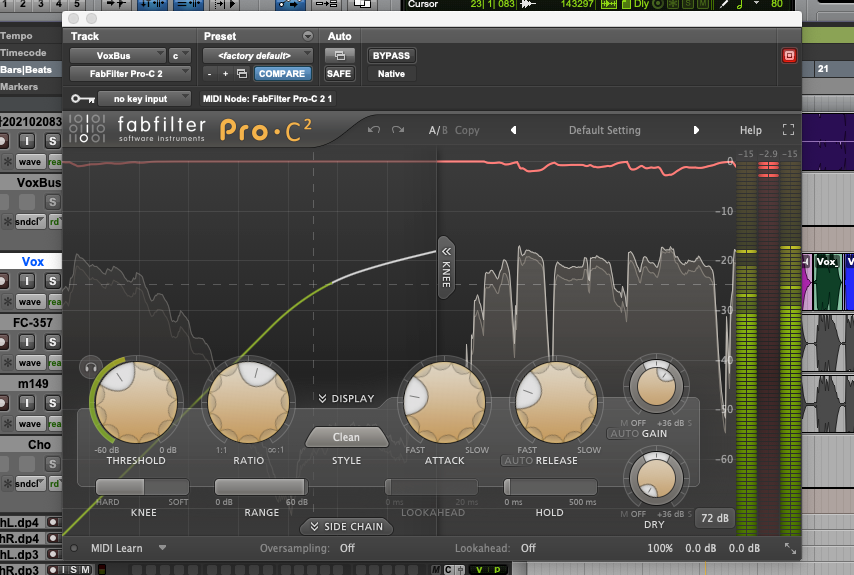

When recording with a director, I tend to avoid using strong compression.
This is because directors can make more accurate judgments
when they monitor the vocalist’s current state and dynamics as they are.
(Of course, this can vary depending on the director’s preferences.)
I used only a slight amount of compression, about 3dB, to control the volume.
A de-esser is essential during recording since sibilance can be especially strong.
I didn’t use the FabFilter Pro-DS, which I always rave about, and instead used the Waves DeEsser.
The main reason is simply that I’m more familiar with the Waves DeEsser for recording.
Another small reason is that as a recording session progresses,
we tend to focus on choruses with stronger dynamics.
By that point, a person’s ears are already fatigued,
and using a de-esser to lightly compress the high frequencies can help reduce that fatigue.
During mixing, problems can sometimes show up that weren’t caught with the original microphone. To be prepared for any situation, I’ll record a reference track of the entire song from beginning to end with a different, unused microphone (in this case, an M149) after the main recording is finished.

After the recording was finished, I created three different monitor mixes to check how well the sketch turned out.
4. Conclusion
This recording session wrapped up smoothly,
and I’ve attached the printed monitor files.
The nine-month recording process is finally complete, and now it’s time to start mixing.
While every part of making music is challenging,
the recording process is difficult in its own way.
The pressure and worry are immense because you’re permanently capturing the results of so much effort.
Having written my own songs, I understand this well,
so I try to approach each session not just as an engineer, but from an artist’s perspective as well.