

The mix is heading toward its conclusion.
Honestly, even if I were to send it after just this much, it would be sufficient,
but there is one more process left:
checking the entire track from beginning to end.
When you listen to the music as a whole after listening to it in sections,
you might hear things you missed.
The music also sounds different depending on the monitoring environment.
This final stage is about checking all of this,
catching the details that were overlooked,
and putting on the finishing touches.
1. Final Automation
There were several minor tweaks. The revisions are as follows.

The kick tended to get slightly buried in the chorus, where the vocal harmonies and other instruments were added.
To give it more support, I boosted the kick by about 2 dB.
Before Kick Automation
After Kick Automation

I shortened the sound’s decay to make the chorus feel more impactfu

I added a bit more reverb to the chorus.
2. Mixbus Processing.
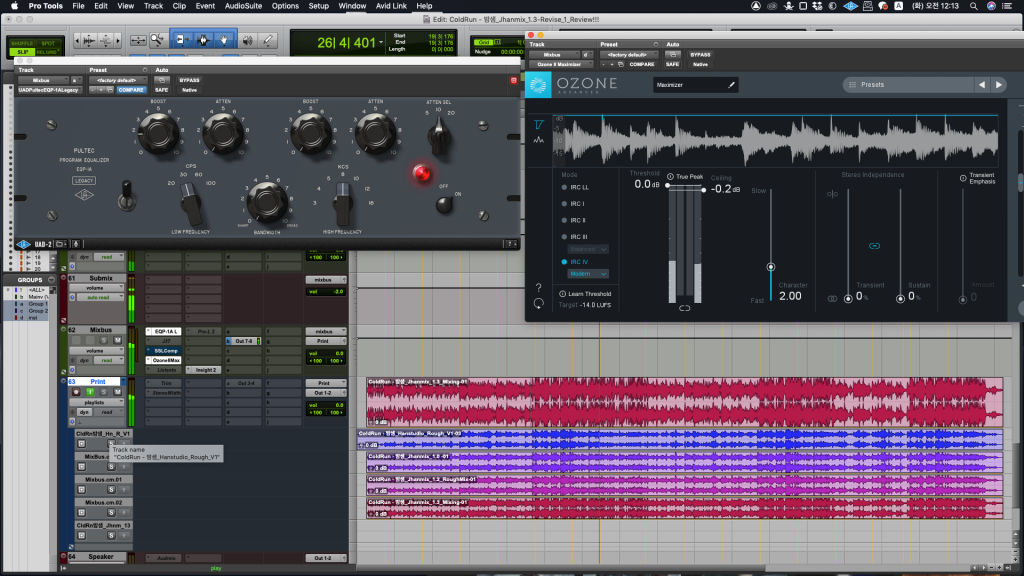
Now, I’m going to add some processing using the mixbus track,
where all the individual tracks are grouped together.
This isn’t always necessary, but if you process it with a few key criteria in mind,
you can further enhance the parts that are lacking in the mix.
I focused on three key points.
1) Musical Balance
I didn’t try to aggressively fix the balance with processing since I had already adjusted it in the final automation stage.
There are quite a few people who believe you have to apply a bus compressor after the mix is finished,
but if you don’t understand its purpose and use it too aggressively,
you can actually ruin the mix (a mistake I made very often).
A bus compressor can be a great tool if you use it from the very beginning
with the goal of sculpting from the big picture to the small,
or if you monitor the mix later and feel the vocals are slightly separate from the instruments
and you want to use it to “glue” them together.
In this case, I decided the mix was already natural enough, so after some consideration, I chose not to use one.

2) Acoustic Balance
The overall mix came out clean, but it felt a bit light,
so I used the UAD Pultec EQP-1A Legacy to boost the low end
by about 1.5 dB. (Due to the nature of the Pultec EQ, it might not be exactly 1.5 dB.)
It’s worth mentioning that many engineers misunderstand and misuse the Pultec EQ.
There are three major things to be careful about:
1) Just applying the plugin itself can increase the volume by about 1.2 to 1.5 dB, creating a subtle shift in balance.
2) You shouldn’t simply think of the CPS knob as just Hz.
3) You need to understand the interconnected mechanism between the knobs.
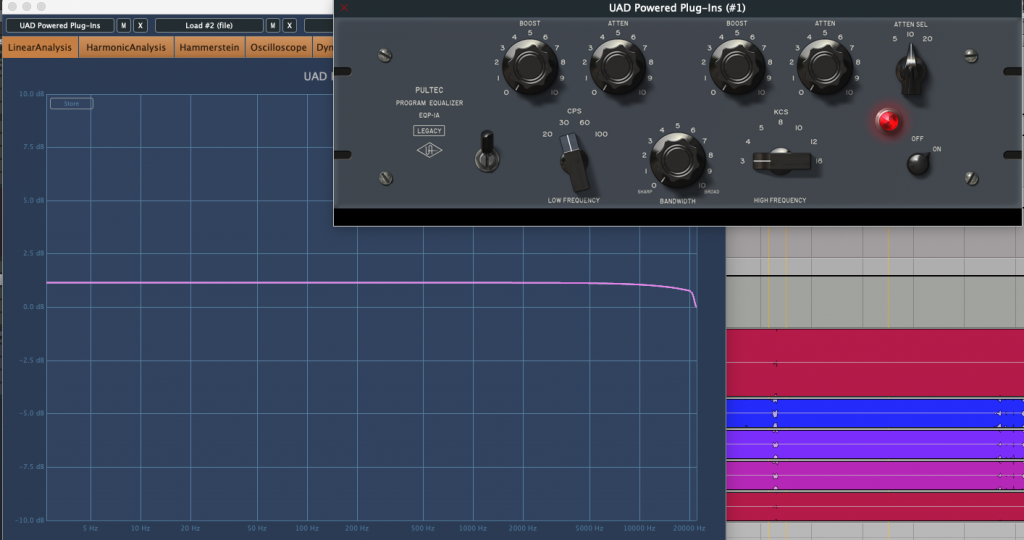
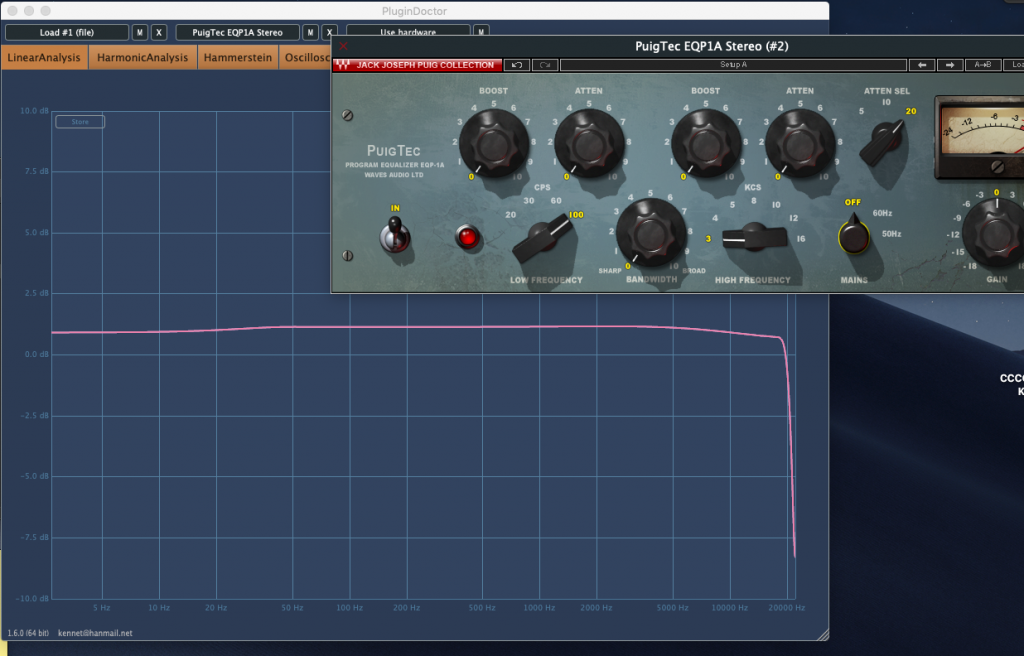
With both the UAD and Waves Pultec EQ plugins, you can see that the volume increases just by engaging them, without making any adjustments.

the resulting graph is identical to applying a Shelving EQ at 300Hz.
There’s an added difficulty in using this plugin:
not only does the volume increase just by applying it,
but unlike other EQs that allow for precise frequency control,
it has slight inaccuracies, similar to its analog counterpart.
This forces you to rely purely on your ears to make judgments.
For this reason, it’s a prime example of a plugin that creates a placebo effect,
making you believe the sound has improved just by being on.
For the exact usage of the Pultec EQ, it’s explained in detail in Alan’s video below,
so be sure to watch it before you use the plugin. It will be a great help.
3) Pre-mastering
Even though the loudness level wasn’t particularly low,
it’s a good idea to increase the sound pressure (loudness) a bit when sending it to the artist.
To prevent any potential clipping,
I used the Ozone Maximizer limiter to slightly lower the ceiling by about 0.2 dB.
Mix bus processing is a very risky operation as it controls the entire audio track.
For example, with EQ, a change of just 1 dB can make a huge difference,
unlike when you’re adjusting individual tracks.
If you try to fix a poorly balanced mix entirely through the mix bus,
any balance you had managed to create can drift even further away.
Above all, objective judgment is crucial for this process,
and making accurate judgments requires critical listening skills.
3-1. What is critical listening?
There is a type of sound science called psychoacoustics.
Simply put, this refers to the subjective judgment of sound based on a person’s
thoughts and environment, rather than on objective factors.
Because of this, an engineer can make two major mistakes:
1) They make too many changes and end up losing their reference point.
2) They become too accustomed to the current sound and fail to identify
problems caused by their room’s acoustic environment.
Therefore, what you need in this situation is critical listening.
A literal translation of the phrase is “critical hearing,”
but in mixing, the intent is to objectively evaluate the quality of your own track
3-2. Critical listening from a consumer’s perspective
There are two main ways to objectively evaluate my mix:
- Monitoring in a different environment or on different speakers than the ones I’m currently working in.
- Comparing it to a reference track.
The key is to identify problems you couldn’t see by listening to your track in a
different environment and against a different track.
(When you first start critical listening, you can often feel overwhelmed by frustration…).
Comparing it to a reference track isn’t a difficult method to understand,
so what does it mean to monitor in a different environment?

The standard for monitoring in different environments is the consumer listening environment.
Different genres have different age demographics for their listeners,
and there are variations in how people listen to music.
Most importantly, no matter how expensive the speakers are that you use for mixing,
your target audience won’t be able to fully hear all the frequency ranges.
This is where the gap between the producer and the consumer arises.
If you’re a mixing engineer, you must be aware of this gap and understand
the environments in which consumers primarily listen to music
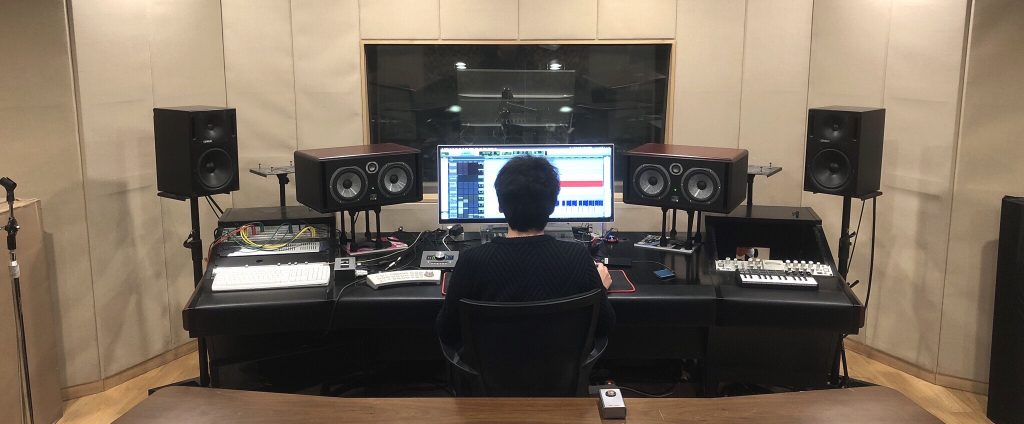
For these reasons, I check by monitoring in various environments.
However, if I had to pick just one of the most widely consumed listening environments,
it would undoubtedly be the smartphone.
Smartphones offer the most convenient and accessible way for people of all ages to engage with music,
and due to the significant difference compared to studio speakers,
it’s crucial to check the mix in this environment.
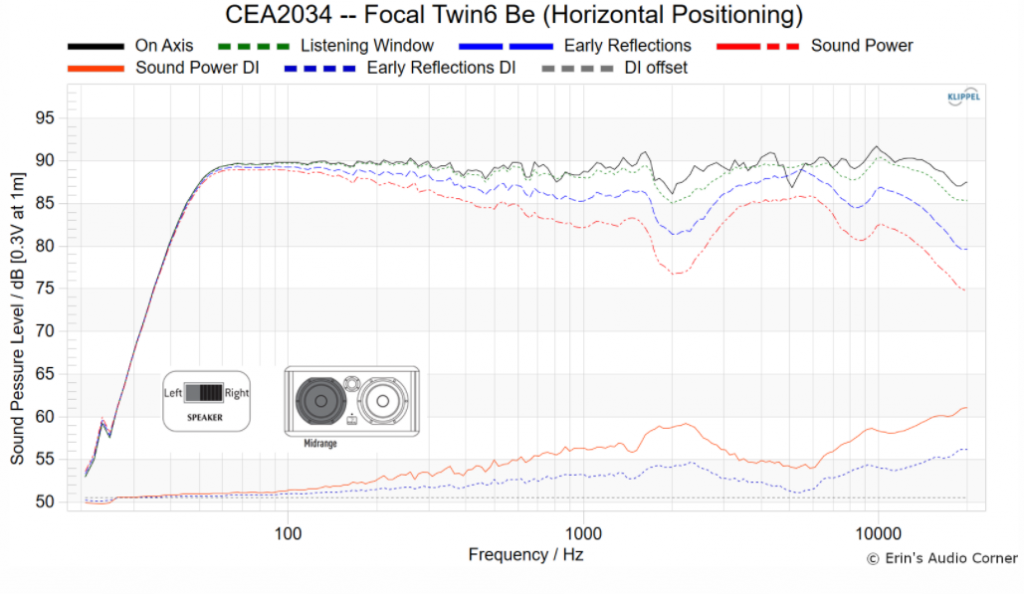
Source.: https://www.audiosciencereview.com/forum/index.php?threads/focal-twin6-be-studio-monitor-review.22254/

As you might expect, there’s a massive difference in frequency range compared to monitor speakers. If you look at the graph, you can see that the response drops off sharply below 500Hz and above 10kHz.
Source : https://imgur.com/gallery/DRbu5
In fact, even without the numerical comparison from above,
you can tell there is a huge difference between studio monitoring and smartphone monitoring.
The biggest difference is in the low frequencies,
so there is no guarantee that a good mix you heard on your speakers will also sound good on a smartphone.
3-3. Smartphone monitoring
The classic way to do smartphone monitoring is to render the audio,
transfer it to your smartphone to listen,
and if there are any revisions, render it again and repeat the process.
While this is the most standard method, it doesn’t take long to realize just how much of a hassle it is.
You can listen to Pro Tools audio directly on your iPhone.
A few years ago, there was a brilliant plugin called audreio
that let you check audio from Pro Tools directly on a smartphone.
For some reason, it hasn’t been updated at all since macOS High Sierra.
While a great plugin called Listento has perfectly replaced it,
it’s a paid subscription service.
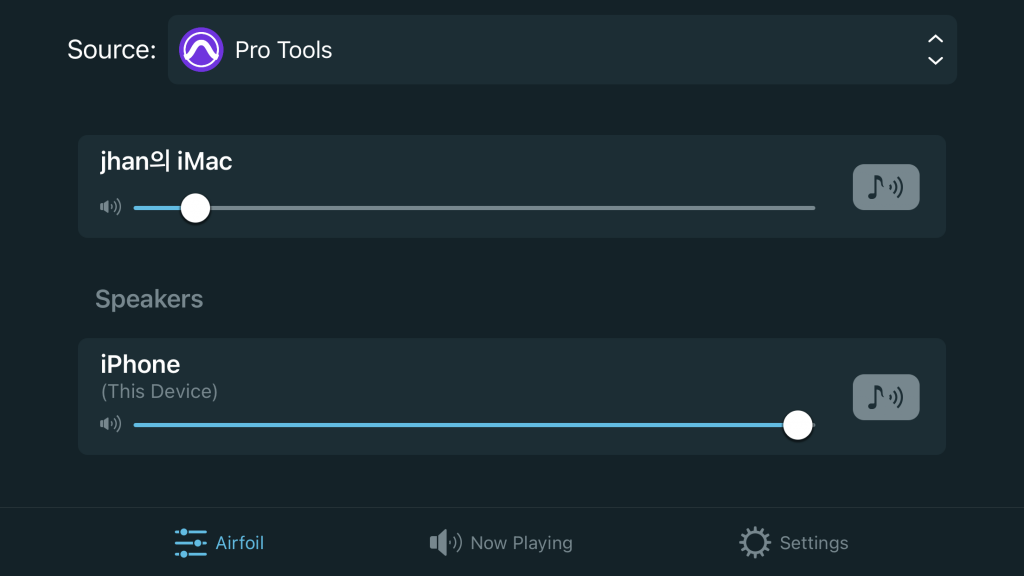
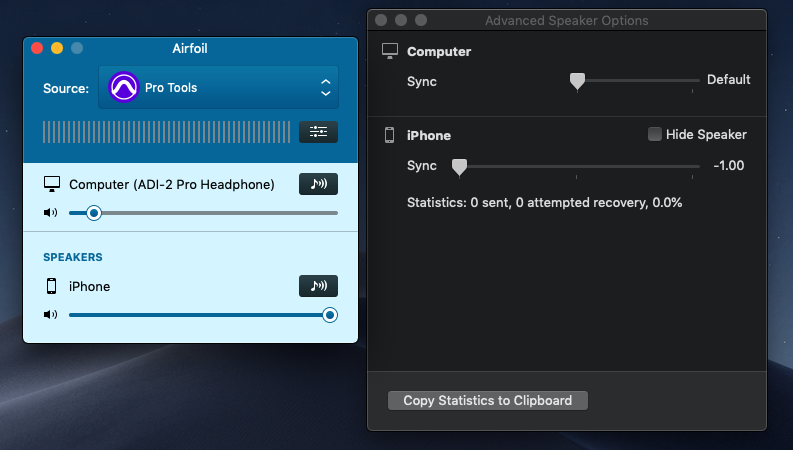
So, what I found as an alternative is an app called Airfoil from Rogue Amoeba.
https://rogueamoeba.com/airfoil/mac/
The original purpose of the Airfoil app is to allow the same music
to be played on other devices like TVs or smartphones using AirPlay or Bluetooth.
However, if you set the source to Pro Tools,
you can listen to the Pro Tools audio directly on your smartphone.
The drawback is a 2-second latency, but this can be reduced to 1 second through the app’s settings.
Using this monitoring method, I listened to the track on
earphones and a smartphone speaker and felt that the vocals
were slightly too loud compared to when I listened on my monitor speakers.
Since the low end is less prominent on those devices,
the instruments sound relatively quieter.
To balance this out, I reduced the vocal bus by about 2 dB in the overall mix.

this made the vocals and instruments feel a bit more naturally connected.
I was able to find a flaw in the audio on a smartphone with a lower sound quality,
something I couldn’t find on good speakers.
This is proof that mixing exclusively on high-quality speakers doesn’t always guarantee a perfect result.
However, since this difference is subtle enough to be a matter of preference,
I plan to create two versions and give the artist the choice.
Before Critical Listening
After Critical Listening
4. Conclusion
With that, the overall work has been completed.
The most important thing to be cautious about during the finalization stage
is to avoid excessive processing.
If you find yourself needing to apply plugin processing to the extent that it overhauls the existing balance,
it means the mix itself needs to be redone from scratch.
With meticulous monitoring and accurate judgment, you can further enhance the quality of your audio.
